
Hasselblad PC Mutar T* 1.4x Converter
Published on 20 March 2018

Hasselblad 203FE & PC-Mutar 1.4x | Leica C-Lux 2
Introduction
The Hasselblad Carl Zeiss PC Mutar T* 1.4x Converter permits 'shifting' the image projected onto film or a sensor vertically. PC stands for perspective control. It manages to do this by the converter part of its name, which means that it magnifies the image projected by the lens, just like an ordinary teleconverter does. This results in a larger image circle (the datasheet says 106mm) which is thus what allows moving the image vertically.
The PC Mutar's main use is to prevent converging vertical lines in a photo, meaning that it is well suited for architecture and other types of photography where straight verticals are important. Because of the 1.4x conversion factor it is often best used with wider lenses. For instance, the medium format 'normal' lens, the 80mm Planar, becomes a longish 112mm with the PC Mutar. I prefer to use mine with the 40mm Distagon CFE. With an effective 56mm it remains a comparably wide medium format lens that can be used in slightly more cramped spaces, such as indoors. According to the datasheet the PC Mutar is "optimized for use with the 40mm Distagon".
Compatibility
The PC Mutar works with lenses from 40mm to 100mm and lets the photographer shift vertically up to 16mm in both directions, except that with 100mm lenses the shift is only 8mm. The converter works with C, CF, CFi and CFE, F and FE lenses.
The PC Mutar can be attached to 500-series, 2000-series and 200-series Hasselblad cameras. It lacks electronic contacts and so stop-down metering is necessary with FE lenses. But because of how the PC Mutar is used this is not a big limitation, see below.
| Lens | Becomes |
|---|---|
| 40mm Distagon | 56mm f/5.6 |
| 50mm Distagon f/2.8 or f/4 | 70mm f/4 or f/5.6 |
| 60mm Distagon | 84mm f/4.9 |
| 80mm Planar | 112mm f/4 |
| 100mm Planar | 140mm f/4.9 |
Metering
Being a 1.4x converter, the PC Mutar will result in a 1-stop loss of light, which needs to be borne in mind when using an external light meter. For cameras with built-in meters, such as the Hasselblad 203FE, or when the PC Mutar is used with metered prisms, it is of course not necessary adjust the meter reading. However as per the manual metering should be carried out with the converter in neutral position to ensure an accurate reading.
Attaching the PC Mutar
The manual gives the impression that the PC Mutar is complicated to attach, but though it involves a few steps it is quite straight-forward.

Fig. 1 Lens cocking lever in the starting position.
1. Attach the PC Mutar as one does an ordinary lens.
The "lens cocking lever" (the triangular handle with the red dot) should be at its left-most starting position seen from the lens and the camera should be cocked (fig. 1).
2. Attach the two cable releases. They look slightly different: the manual calls one "adjustable" and the other "fixed". The only visual difference is that the adjustable one has two silver nuts where it attaches to the cable release handle.
The adjustable cable goes into the front-most thread on the PC Mutar (fig. 2, cable to the right), which Hasselblad calls the 'lens release cable thread'.
The fixed cable release attaches to thread behind (fig. 2, left cable), which is called the 'camera release cable thread'.
Note that the manual talks of an L-shaped connector which should be fitted to the lens release thread but I don't have one and the PC Mutar works without it.

Fig. 2 Fixed cable release (left) and adjustable cable release.

Fig. 3 Lens release lever in "a middle position".
3. To ensure proper functionality, Hasselblad wants us to do a dry run, that is, without magazine attached. The exact procedure varies depending on which camera is used and which lens one has attached. I usually do one such check before I begin shooting.
C, CF, CFi and CFE (used with in-lens shutter)
Set a slow shutter speed, like 1/2s, and a small aperture. Depress the cable release until the lens cocking lever moves to "a middle position", to quote the manual (fig. 3). Verify that the lens shutter closes (the viewfinder darkens) and that the auxiliary shutter (or in a 2000/200 series camera, the focal plane shutter) remains closed.
Then, pressing the cable release button further, the camera should perform a pre-release by opening the auxiliary shutter (or focal plane shutter) and lifting the mirror, BUT WITHOUT opening the lens shutter. The lens cocking lever remains in the same middle position.
Then, pressing the cable release button even further, the camera should make an exposure by opening the lens shutter.
Finally, release the cable relase button, which closes the auxiliary (or focal plane) shutter, and wind the camera.
Adjustment: If the pre-release occurs simultaneously as the exposure (or even after it) one needs to adjust the adjustable cable release's two nuts mentioned earlier. Hasselblad recommends to unscrew them one turn, lock the nuts tightly and try the above procedure again. There should be a distinct gap between the pre-release and the exposure.
F, FE or CFE (used with the camera's focal plane shutter)
Set a slow shutter speed, like 1/2s, and a small aperture. Depress the cable release until the lens cocking lever (fig. 1, above) moves to a middle position. Verify that the lens stops down (the viewfinder dims) and that the focal plane shutter remains closed.
Press the cable release button further to make an exposure, then release to let the mirror return, and wind the camera.
Using the PC Mutar
To use the PC Mutar keep the camera level (well, unless you don't want to for some reason) and frame the shot as you would normally. To shift the lens, untighten the large knob on the left-hand side, which Hasselblad helpfully calls the "Displacement locking knob". Be prepared to catch the weight of the lens because once that knob is loose gravity will do its thing very quickly.
As the lens is moved up or down the very top/bottom of the viewfinder will begin to vignette. This will obviously not end up on the film and is usually not a problem when it comes to framing the shot. I have found, though, that when using the PC-Mutar at night this vignetting makes it difficult to know if the upper part of, say, a building is in the viewfinder.

Fig. 4 Maximum shift up.
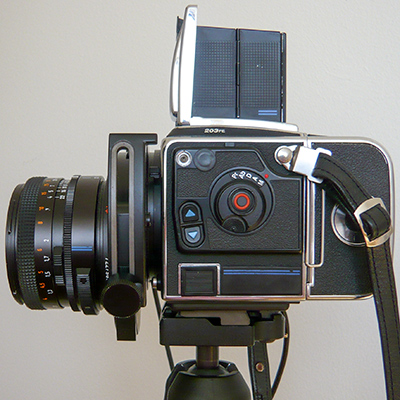
Fig. 5 Maximum shift down.

Fig. 6 The PC Mutar shifts in a slightly circular fashion.
The PC Mutar does not shift completely vertically but there is a slight circular movement to the shift (fig. 6). This means that one may have to adjust the camera's position because what was horizontally centered with the PC Mutar in neutral position will have moved to the side a little bit.
If one uses the focal plane shutter in a 200-series Hasselblad it is obviously unnecessary to use the adjustable cable release. One will need to remember to close down the lens manually for metering, though. It is also possible to use such a camera's mirror pre-release/self-timer function, which is handy to keep vibrations to a minimum.
As can be seen in fig. 2, the PC Mutar attaches very closely to the camera body and is also wider than the body. This means that it is a bit fiddly to use the manual shutter speed ring on a 200-series body. I would expect the same to be the case with a 2000-series body. I haven't found that this would impact the usefulness of the PC Mutar in any negative way, but some might find that this takes some getting used to since Manual is the mode one will mostly use with the PC Mutar.
One last note, lens and PC Mutar need not be detached in a particular order.
Image quality
I have used the PC Mutar with the 80 Planar FE and the 40 Distagon CFE. While I haven't carried out any tests I do not see any degradation of the image quality. Below are a few examples. Click the images for large scans.


Summing up
There is not very much information about the PC Mutar online, but some opinions I have read complain that the PC Mutar is impractical, and even quite useless, because it only allows a limited amount of vertical shift and nothing else. And certainly, for more movements one will need to turn to, for instance, large format cameras.
But, and it is a big but, the PC Mutar does one thing very well, and that is provide sufficient shift for most applications in an easy-to-use package. So if that is what one needs, and one has a Hasselblad V kit, then it is a great accessory. The fact that it doubles as a 1.4x Carl Zeiss-made teleconverter is an added bonus. At 490gr it weighs a little bit more than a film magazine and it is also not very bulky, even with the two cable releases, meaning that it is easy to bring.
