Slide film: Why I don’t use ColorPerfect
Published on 7 March 2016

Non-linear TIFFs are much better
I usually avoid using Color Perfect and linear scans for my slide films and instead scan them as linear TIFFs. When I began using ColorPerfect a few years ago it was in order to find a way of dealing with the orange mask of colour negative film and arrive at an OK-ish colour temp as easily as possible. For colour negative films ColorPerfect is very good, but there are two main reasons why I don’t use it for slide film, one is image quality-related and the other is workflow-related.
I don’t subscribe to the view that an image is final out of the scanner and will virtually always post-process my scans. With this in mind I try to keep my workflow as simple as possible. If I can cut steps I will.
ColorPerfect’s default setting appears to be to blow highlights by varying degrees. I seem to remember having read that this is by design because the plugin was designed mainly to be used with colour negative film which has a considerable latitude. How much the highlights will be affected when an image is opened in ColorPerfect depends on the quality of the scan so it is difficult to be generic but in virtually all slide film scans that I make the Black slider (which controls highlights) will be above, and sometimes far above, zero.
ColorPerfect does include highlight and shadow recover functions but they – and in particular the highlight recovery function – don’t work very well with slide film, generally speaking (examples below) and sometimes also not very well with C41.
Because the highlights are ‘stressed’ by default I will have to adjust the image within the plugin itself. This adds a step to the workflow (with several sub-steps due to the fairly clunky interface). I would happily accept this extra step if the results were good, but in my view they rarely are. In fact, the results will often be unpredictable. Beginning to edit the image in ColorPerfect will set the whole post-processing exercise off on the wrong track. Naturally, for colour negative films going into ColorPerfect is necessary to deal with the orange mask. However, even if ColorPerfect had not caused poor results in the highlights, there is very little else that is useful (imho) in the plugin with respect to slide film scans. Take for example its colour controls. For slide film, ColorPerfect’s main colour correction tools are the “Ring Around” function and the auto colour function.
While Ring Around is quite intuitive as a matter of theory (it’s based on adding and subtracting opposing colours a bit like the Lab colour space works), it is in use quite fiddly with nine smallish windows representing various colour temperatures. Add to this that ColorPerfect’s image preview is generally of considerably less quality than what Photoshop shows. Apparently this has to do with how plugins work within Photoshop itself. This has a negative effect on how easy to use the Ring Around function is.
The auto colour function is the other main colour tool in ColorPerfect, but I find that it doesn’t work very well with slide films because of how the long vertical slider cycles through alternative colour versions of the image. Very often the actual ‘span’ on the slider, where acceptable colour is to be found, is very narrow and it takes a few tries to nail it. Generally speaking, with colour negative films the ‘span’ of acceptable colour seems to be broader, which means it is easier to achieve good colour. Add to this that ColorPerfect contains quite a few film profiles which can (but, granted, don’t always do) provide a good starting point.
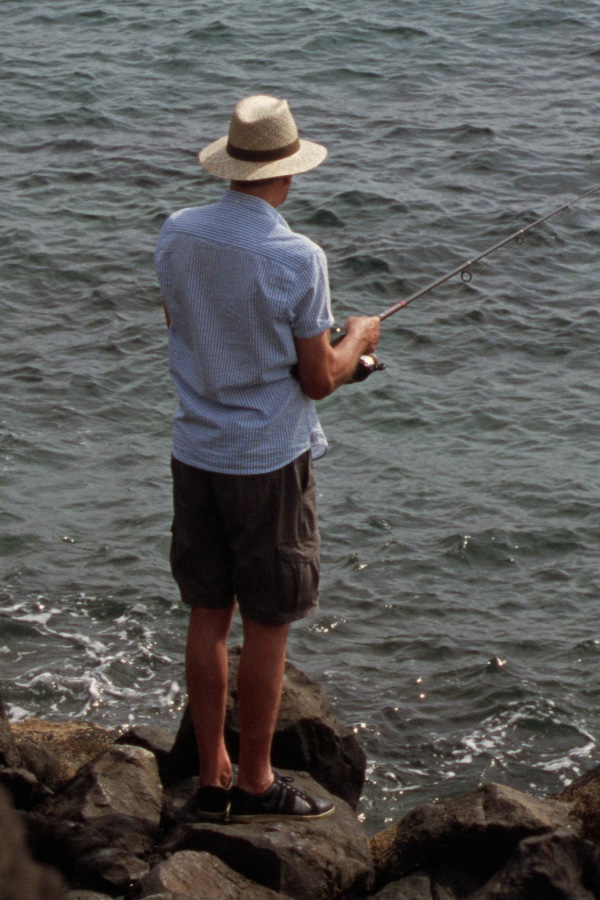
Here are a few examples to hopefully show what I mean. The first image is a linear scan (using the Vuescan settings recommended by the ColorPerfect folks). This makes a slide come out like this at the other end.

Linear RAW
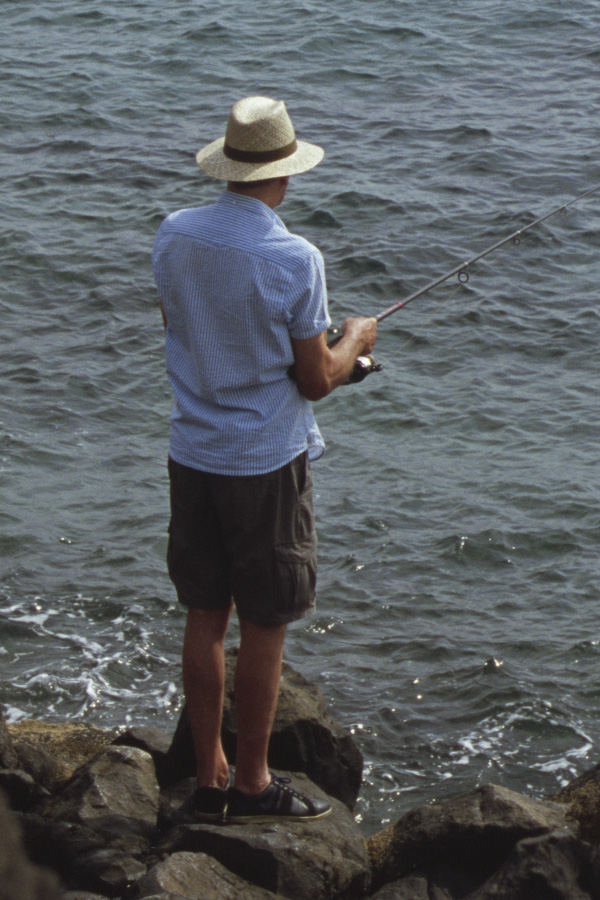
Opening this file in ColorPerfect and setting the mode to L(inear) in ColorPos results in the following, having only OK’d out and saved as JPG. To make it easier to see what I mean I’ll use a crop of this frame in the following.

Linear RAW Color Pos L

Linear RAW Color Pos L (crop)
As can be seen, due to ColorPerfect’s default setting, the hat’s highlights and the shoulders have been severely blown. Using this image for further post-processing will cause very negative effects in the highlights if, for instance, curves were to be added.
To get a more neutral scan using ColorPerfect I would need to counteract the blown highlights by pulling the Black slider to zero (I’ll come to the highlight recovery tool in a minute). Oddly the White slider, which controls the shadows, is often by default at the equivalent of the Black slider’s zero (even though the number value isn’t actually zero). I say ‘equivalent’ because moving the White slider towards zero will not make the shadow areas less dense (in the same way that moving the Black slider towards zero brings out more detail in highlights); rather moving the White slider towards zero will only make the shadows wash out and become less contrasty and ‘grey’.
In this version, I have pulled down ColorPerfect’s “Black” slider to zero. This brings back detail in the hat and makes the image slightly duller.
Linear RAW Color Pos L Zero Highlights
In many cases it will not be possible to recover highlights very well in slide film. So, depending on how well the image has been exposed, scanning linear and using ColorPerfect may result in completely irrecoverable highlights. Very contrasty scenes will often result in particularly poor scans in this respect.
About ColorPerfect’s highlight recovery function. This function (and it’s shadow-related sibling) is designed to recover blown highlights (or shadows) by selecting by how many “f stops” these areas of the image should be corrected. As great as this sounds I have found that the highlight recovery function often results in unnatural-looking highlights if one tries to correct too far down the f-stop scale (more than 0,5 stops or so).
Below is the linear scan ‘developed’ in ColorPos L (without zeroing the Black slider but) with highlight correction set to 0,5 stops. The brim of the hat becomes a mushy yellow. In my experience, the more blown the highlights are, the worse they will look after using the highlight recovery function. Very often for contrasty images – even for colour negative images – the highlights take on a blueish/greyish/pale and generally quite terrible look.
Linear Raw ColorPos L 0,5 stop highlight correction (but without zeroing Blacks) (crop)
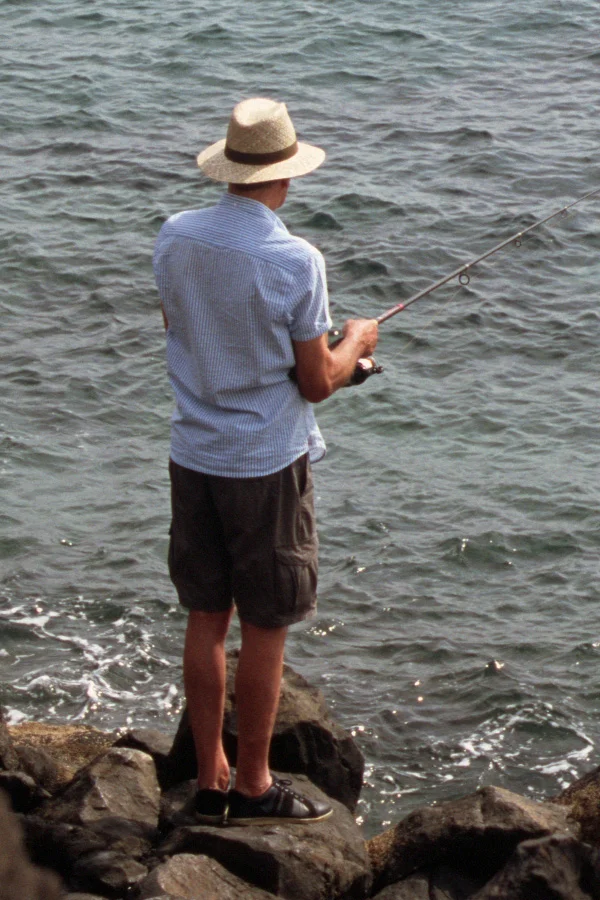
Now for a non-linear scan — i.e. where the RAW checkbox on Vuescan’s Output tab is unchecked and TIFF is instead checked. This gives the following out of the scanner. I find that it makes sense in non-linear mode to use one of the Color Balance settings on the Color tab to simplify the coming steps in the workflow. I usually use Autolevels which is “good enough” for further editing, however sometimes I use Neutral or White Balance.
Here is the non-linear scan of the full frame for comparison with the crop of a non-linear scan using the Autolevels setting.

Non-linear scan Auto Levels
Non-linear scan Auto Levels (crop)
Ignoring for a moment the difference in colour between this scan and the second one above (Linear RAW Color Pos L), this non-linear scan has much less blown highlights than the linear RAW scan. Note also that the shadow area of the hat is a lot less dark, which means that it has retained more image information. The big difference between these two images is that to arrive at a similar result in terms of how much information is retained in the highlights with a linear scan, I need go into ColorPerfect and make the adjustments using its clunky interface, which adds a step to the workflow and risks causing unpredictable effects on the image. True, the colour may (again depending on the image, based on my tests) look ‘richer’ if one uses ColorPerfect, as the above linear scan shows, but given that I will always edit my images further using Adobe Camera Raw and sometimes Photoshop that is of little concern.